Posts Tagged ‘dinner’

- In: Entertaining | Healthy Body | raw food | veggie foods
- 1 Comment

Description
When it’s hot out no one wants to be slaving over a stove of boiling noodles. This is why raw recipes make so much more sense during the summer season! When it comes to raw pasta the secret is definitely in the sauce, and having a nice balance of salt, tang, and sweet will make all the difference. Enjoy this mouth watering pasta marinara by Lisa Viger for dinner tonight and keep the heat out of the kitchen.
Recipe by

Ingredients
2 ripe tomatoes
6 pieces sun dried tomatoes ![]()
1 small onion
1/2 red bell pepper
1 tablespoon coconut nectar
2 tablespoons olive oil ![]()
1 teaspoon dried basil
1 teaspoon dried oregano
1/2 teaspoon salt![]()
1/4 teaspoon pepper
2 medium zucchini, noodled and marinated
Methods/steps
1) Puree the sauce ingredients in a food processor fitted with an “S” blade. Let process for a few minutes until very creamy (or don’t process as long if you like it more chunky, but it won’t be like Spaghetti-Os!).
2) Make noodles in your usual way from the zucchini. I marinated mine for about an hour in a tablespoon of the basil and oregano flavored olive oil from last week, with a bit of salt. Serve with the marinara sauce and a dash of basil and oregano.
Salt-cured Watermelon, Roasted Cashews, Mint and Cream Cheese
We have a big watermelon. We did as many things as we can from this big ass watermelon we bought from a convenience store. It was fun.

I know what you’re thinking. This looks like tuna sashimi. Hah! Pretty cool illusion huh.
But no, it’s watermelon. ![]()
So! I got to learn about salt-curing watermelon recently when I read Angelo Sosa’s new book, Flavor Exposed. Pretty cool book, considering the fact that I can relate to most of the asian inspired flavor profiles from my asian roots. I chose to post this because it was so easy to make and so refreshingly fun to eat.
We have something like a salad here. It was constructed with the thought along the lines of watermelon feta salad and also the other fact that I do not like feta. Hence the watermelon and left-over Philadelphia cream cheese salad was born. Roasted cashews for texture and good flavor. Mint and olive oil for a little earthy fruity bright finishing touch. Very nice you know.
Thank you very much for reading this really short post. You will find the recipe just below! Stay tuned to find out what happened to the rest of the watermelon.
Recipe
serves 4-6
500g watermelon, rinds removed and cut large dice
3tsp kosher salt
1tbsp mint, chopped
100ml extra virgin olive oil
2tsp freshly cracked black pepper
100g cashew nuts, roasted and smashed into bits
100g cream cheese, torn into bits
Lightly toss watermelon cubes in salt and chill for 30 mins. Meanwhile mix mint, pepper and olive oil. When watermelon is ready, pat them dry on kitchen paper and lightly toss them in mint and oil mixture. Sprinkle cashews and cheese. Serve cold.
Vegan Creamy Potato Salad
Posted on: August 27, 2012
reposted from Livvy at 86lemons.com
 RECIPE:
Vegan Creamy Potato Salad
ADAPTED VERY SLIGHTLY FROM:
The Blender Girl at www.healthyblenderrecipes.com
So I was in the grocery store last week when I remembered I needed to make potato salad for a meal I was bringing to a friend (she’s battling cancer and has a hubby and three little ones). I googled “vegan potato salad” on my iPhone and found this recipe. I was in a hurry, so I missed a few ingredients on the list. No harm done. It was still absolutely delicious. And – bonus! – I discovered a very helpful website with tons of great vegan recipes. You can search Tess Masters’ “Healthy Blender Recipes” website for easy vegan, vegetarian, raw and gluten-free recipes which can all be made in a blender, mixer or food processor. When you ‘like’ her Facebook page and sign up for her email list, you will get a link to download her free eBook, “Best of Healthy Blender Recipes.com.” Sweet, right?!
Back to the potato salad. This one is creamy, crunchy and full of flavor. You would never guess that it’s vegan. Hubs (who is not vegan) only eats potato salad that doesn’t have egg in it (he hates eggs). And he can be a bit of a potato salad snob. Fortunately, he loved what little was left of this one (I gave most of it to our friends).

You will need a 3 lb. bag of red skin potatoes. Cut the potatoes into large cubes.
Place the potatoes in a large pot and cover them with cold water.
Add 2 Tbsp of sea salt to the water and bring to a boil over high heat.
Reduce heat and simmer for about 10 minutes or until just done. (While potatoes are simmering, cut up your veggies – see below.)
Rinse potatoes with cold water and drain thoroughly.


1 cup (about one bunch) green onions, finely chopped
1 red bell pepper, finely chopped
1 cup (about 4 large stalks) celery, finely chopped
1 cup broccoli stalk, finely chopped*
½ cup red onion, finely chopped*
1 cup parsley (or dill) finely chopped* (You will add this at the very end.)
*NOTES
I didn’t have any broccoli stalks, so I used extra celery. But the salad didn’t need the extra. In my opinion, you only need the celery or the broccoli stalks, not both (or use half the amount of each). I forgot to buy red onion, so I skipped it. I felt like there was plenty of onion flavor already with the green onions. Again, I think you could use either one (you don’t really need both). I’m not a huge parsley fan, so I used fresh dill instead. And I think you can get away with much less than a cup. It just depends on your personal taste.

Combine the potatoes and chopped veggies (except for the parsley).
For the dressing, you will need:
1 cup of vegan mayonnaise* (I used this one.)
2 Tbsp. dijon mustard
½ tsp. apple cider vinegar
Combine these three ingredients using a blender.
Pour the dressing over the vegetables and mix thoroughly.
Stir in the chopped parsley (or dill), then season with sea salt and black pepper to taste.
*NOTES
The original recipe calls for one batch of The Blender Girl’s Vegan Mayonnaise, but I didn’t have all the ingredients on hand. So I cheated with vegenaise (and it still tasted great). Next time, I’ll try it the real way.

Chill or serve at room temperature.
It’s a good thing I was making this for our friends because I might have eaten the whole bowl if left to my own devices. It’s that good.
Enjoy!

This grilled shrimp recipe pairs tangy cilantro lime shrimp grilled for a light smoky flavor and cool and spicy avocado puree dip for an appetizer with a chic flair.
Yields 8 servings
Ingredients:
2 limes, juiced and zested
½ cup roughly chopped fresh cilantro
1 tsp. ground cumin
4 Tbsp. extra-virgin olive oil
2 lbs. large shrimp, peeled and deveined, tails intact
Spicy Hass Avocado Puree (see make-ahead recipe below)
Fresh sprigs cilantro, for garnish
Spicy Hass Avocado Puree
3 ripe, Fresh Hass Avocados, peeled, seeded and scooped out
3 Tbsp. fresh lime juice
¾ cup sour cream
1 green jalapeño, seeded and chopped
Salt, to taste
Instructions:
1. In a large mixing bowl, combine the lime juice and zest, cilantro, cumin and oil and whisk well.
2. Add the shrimp and toss to coat. Do not marinate shrimp longer than 5 minutes or the lime juice will begin cooking the shrimp.
3. Preheat a barbecue or grill pan to medium-high heat.
4. Season the shrimp with salt and pepper to taste and grill for 2 to 3 minutes on each side or until lightly charred and cooked through, making sure not to overcook the shrimp.
5. Remove the cooked shrimp from the grill and place on a serving platter, with a small serving bowl of the Spicy Hass Avocado Puree. Garnish the shrimp with fresh sprigs of cilantro and serve.
Spicy Hass Avocado Puree
1. Add the avocado, lime juice, sour cream and jalapeño to a blender and puree until smooth, scraping the sides of the blender as needed.
2. Season puree with salt to taste.
3. Place in a covered airtight container and refrigerate until serving.
Note: Large avocados are recommended for this recipe. A large avocado averages about 8 ounces. If using smaller or larger size avocados adjust the quantity accordingly.
Photo & recipe are copyright & courtesy of the Hass Avocado Board
chickpea panzanella
Posted on: August 23, 2012
chickpea panzanella

Have you ever had a kitchen sink salad?
That’s what this is…with a prettier name. It was going to be a Greek salad but somehow I got derailed when the bread went in. Mmm…bread.
As you can see, there’s a lot going on in that bowl. The line up includes chickpeas, mini cherry tomatoes, bread chunks, feta, lemon zest, basil and celery leaves (my new favorite ingredient by the way). It’s dressed with lemon juice and lots of good olive oil. So basically it’s a big bread salad with lots of stuff in it. Or better yet, a chickpea panzanella with a Greek twist? That sounds better.

The beauty of a salad like this is that you can throw in/take out whatever you’d like. However, if you’re in the mood for something crunchy and refreshing, this particular combination fits the bill (celery leaves! celery leaves!) It’s a great salad for a crowd or better yet, a little bowl of heaven to enjoy at lunch.
| chickpea panzanella |
- Salad
- 1x 14 oz. can of chickpeas, rinsed & drained
- 1 c. mini cherry tomatoes, halved
- 1 c. bread chunks, torn (day old is best)
- 1 c. cucumbers, thinly sliced
- 1/4 c. sweet onion, thinly sliced
- 1/4 c. Kalamata olives, pitted and chopped
- 1/3 c. feta, crumbled into large chunks
- 1 lemon, zested
- handful of celery tops
- handful of basil, torn up with your hands
- Dressing
- juice of 1/2 a lemon + more to taste
- 1/4 c. good quality olive oil
- Get yourself a giant bowl.
- Dig out your mandoline if using and thinly slice your cucumbers and onion (I highly recommend this).
- If you do not have day old bread, simply tear some up into bite size chunks. Toast in a 350 F oven for about 10 minutes or so. Don’t burn them!
- Meanwhile, zest your lemon and set aside.
- Add all of the salad ingredients to the bowl, minus the feta (if you add it too early, it will crumble and disappear into little pieces when tossed).
- Add the lemon juice and olive oil. Season with salt and pepper and give it a toss.
- Now fold in your feta.
- Taste your salad and if you need to, adjust with more lemon, olive oil and seasoning.
Fried Green Tomato and Shrimp Remoulade Po Boy

After enjoying the fried green tomatoes with shrimp remoulade so much last week, I simply could not resist turning it into a po’ boy sandwich. (A po’ boy is a sandwich from Louisiana that is served in a baguette.) I already knew that the crispy and tangy fried green tomato and succulently spicy shrimp and tasty remoulade sauce was a winner and wrapping it up in a fresh baguette with its chewy outside and soft, melt in your mouth inside, could only make things better! I think that I have found my new favourite po’ boy; it’s too bad it is so late in the season. I will be looking forward to making them again next year!
Fried Green Tomato and Shrimp Remoulade Po Boy
(makes 4 sandwiches)
Printable Recipe
1 pound shrimp (shelled and deviened)
1 tablespoon oil
1 tablespoon creole seasoning
1 baguette (cut into 4 sandwich sized lengths and sliced in half)
1 cup lettuce (shredded)
6 slices fried green tomatoes (about 2 tomatoes worth)
1/4 cup remoulade sauce
Directions:
1. Toss the shrimp in the oil and creole seasoning to coat.
2. Saute in a pan until cooked, about 2-3 minutes per side.
3. Assemble the sandwiches and enjoy!
source: http://www.closetcooking.com/2010/09/fried-green-tomato-and-shrimp-remoulade.html
Lasagna ‘à la Zen’
Posted on: August 12, 2012
Lasagna ‘à la Zen’
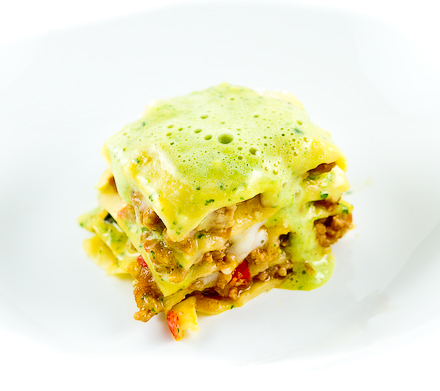
My refrigerator can be a place of great discoveries when i gather enough strength to clean it. It’s a dangerous business, though. On bad refrigerator days I’ve scared myself to death with vegetable bin monsters but on good days pulling things out is a bit like watching a dish create itself in front of my eyes.
Last sunday, it occurred to me that the leftover ground meat with soffrito i used in empanadas a day earlier (delicious by the way), and the roasted kabocha squash that was used on a pizza along with a chunk of tallegio had some affinity for one another, and that’s how this lasagna came to be. The half bunch of cilantro that needed some urgent lovin’ turned into a quick emulsion sauce. It brightened up the dish. It was as though rescued ingredients had come together to throw a symphony. Pasta always does a great job at unifying flavors and textures and this was no exception.
So here you have it, friends. I think it deserves a little moment in the spotlight. The recipe is approximate since the dish was made from leftovers but this is meant to provide inspiration. Feel free to come up with your own version. All hail the lasagna!
-
Lasagna ‘à la Zen’
- Serves 4
-
-
For the pasta dough:
- 3 cups all-purpose or “00″ flour, plus more for dusting work surface
- 1/2 teaspoon salt
- 4 whole eggs
- 4 yolks
- 2 tablespoons olive oil
-
for the soffrito/ground meat:
- 3 tablespoons olive oil
- 1 onion, minced
- 1 red pepper, minced
- 1 garlic clove, chopped
- 1 1/2 lbs ground meat (beef/pork/veal)
- 4 tablespoons tomato paste
- 1 tablespoon chipotle in adobo, chopped (optional)
- 3 tablespoons chopped fresh cilantro
- 1 tablespoon sesame oil
- 2 teaspoons sugar
- Salt and freshly ground black pepper
-
For the tallegio bechamel:
- 2 tablespoons butter
- 2 tablespoons flour
- 2 cups milk
- 1 teaspoon salt
- 8 ounces tallegio, cubed
-
To finish:
- Roasted Kabocha squash
- Parmesan
- 2 tablespoons rice wine vinegar
- 1 shallot, chopped
- 1 cup half and half
- salt and pepper
- 1/2 bunch cilantro
-
-
-
For the pasta:
- Combine the flour, the salt, the eggs, yolks and olive oil in a Kitchenaid bowl and combine on low speed using the dough hook (this also could be done by hand in a large bowl). Increase the speed until you get a rough dough. This should take 1 or 2 minutes.
- When the mixture comes together transfer to a floured clean surface and knead the dough, turning the inside-out, until you obtain a dough that’s smooth on the outside, adding flour everytime the dough starts to feel sticky. The whole process should take less than 5 minutes. Wrap the dough in plastic wrap and let it rest in the refrigerator for at least 2 hours, or overnight.
- Take the dough out from the fridge and place it on a floured surface. Cut it in 4 equal pieces. With a rolling pin make rectangle with the pieces of dough, so that they fit inside your pasta machine.
- Start rolling pasta sheets on the thickest setting and cut in half (so it doesn’t get too long). Keep rolling reducing the setting everytime. The number “8″ setting on my machine is where i usually stop.
- You should be able to see your hand through the pasta sheets when you have reached the right thickness. You want it thin but not so thin that it becomes fragile.
- Blanch the pasta sheets in boiling salted water and cool in a ice bath. Drain. Reserve on the side.
-
For the soffrito/ground meat:
- Add the olive oil to a skillet over medium-low heat. Add the onions and peppers, stirring occasionally, for 30 minutes. Add the garlic then add the tomato paste and adobo stirring until combined. Add the ground meat, season, and stir until the mixture is cooked. Add the cilantro, the sesame oil and sugar. Let the mixture cool.
-
For the Tallegio bechamel:
- In a medium saucepan, heat the butter over medium-low heat until melted. Add the flour and stir until smooth. Over medium heat, cook for 2 minutes.
- Meanwhile, heat the milk in a separate pan until just about to boil. Add the hot milk to the butter mixture 1 cup at a time, whisking continuously until very smooth. Bring to a boil. Cook 5 minutes, stirring constantly, then remove from heat. Add the tallegio and stir until melted. Season with salt.
-
To finish:
- In a buttered dish, layer the pasta sheets with the ground meat mixture, kabocha squash, parmesan and Tallegio bechamel. Bake for 20 minutes at 350′F. Meanwhile combine the vinegar and shallots in a small saucepan. Boil for 2 minutes. Add the half and half and bring to a boil. Reduce for 3 minutes. Season with salt and pepper. Add the cilantro and blend until frothy. Serve with the lasagna.
-
Vegetable Goat Cheese Terrine
Posted on: August 10, 2012
- In: Cooking | Entertaining | Healthy Body | Healthy Home | raw food | veggie foods
- Leave a Comment

by Susan Back, Kelowna BC
Vegetable Goat Cheese Terrine.
A slice of this cool vegetarian terrine is heavenly on a warm evening. With layers of eggplant, zucchini, red pepper and goat cheese, this dish is easy to make and very impressive. You can use two different coloured sweet peppers for really
dazzling
presentation.
1/4 cup (60 mL) extra-virgin olive oil
1 tsp (5 mL) dried oregano
1 clove garlic, minced
2 zucchinis
2 sweet red peppers
1 lb (454 g) eggplant, (about 1 large)
2 pkg (each 4.5 oz/130 g) goat cheese, softened
3 tbsp (45 mL) chopped parsley or basil
1 tbsp (15 mL) milk 1 green onion, choppe
1/4 tsp (1 mL) salt
1/4 tsp (1 mL) pepper
Cut piece of cardboard same size as inside top of 8- x 4-inch (1.5 L) loaf pan; covercardboard with plastic wrap. Line pan with plastic wrap, leaving enough overhang to
cover top. Set asid
In large bowl, whisk together oil, oregano and garlic; set asid
Cut zucchini lengthwise into 1/4-inch (5 mm) thick slices. Core and seed red peppers; cut into quarters. Cut eggplant crosswise into 1/4-inch (5 mm) thick slices. Add vegetables to bowl and toss to coat.
Place zucchini and peppers on greased grill over medium heat or under broiler; close lid and grill, turning once, until tender and skins on peppers are charred, about 12 minutes. Let cool enough to handle; peel skin from peppers. Set aside.
Place eggplant on grill or under broiler; close lid and grill, turning once, until browned and tender, 5 minutes. Let cool.
Meanwhile, in bowl, mix together goat cheese, 2 tbsp (25 mL) of the parsley, milk, onion, salt and pepper.
Arrange one-third of the eggplant in even layer in prepared pan; top with half of the zucchini, cutting to fit if necessary. Spread with half of the goat cheese mixture. Top with peppers, then half of the remaining eggplant. Spread with remaining goat cheese mixture. Top with remaining zucchini, then eggplant.
Fold over plastic wrap overhang to cover terrine completely. Place prepared cardboard on top of pan; weigh down with heavy can. Place pan on rimmed baking sheet to catch any overflow; refrigerate for 6 hours. (Make-ahead: Refrigerate for up to 24 hours.)
Remove cardboard and uncover; turn out onto cutting board and peel off plastic wrap. Using sharp serrated knife, cut into 1-inch (2.5 cm) thick slices. Arrange on serving plate; sprinkle with remaining parsley.
Quinoa dinner!
Posted on: July 26, 2012

Quinoa is an ancient grain native to South America. Its nutty taste and chewy texture make it a great alternative to other grains in salads and soups or as a side dish. Here it pairs perfectly with other South American produce, such as corn and black beans.
I like the way the Paprika gives the Quinoa a beautiful saffron colour.
Quinoa Salad with chicken and Black Beans.
2 tbsp (30 mL) extra-virgin olive oil
1 clove garlic, minced
1 tsp (5 mL) paprika
1 cup (250 mL) quinoa
2 boneless skinless chicken breasts, diced (about 12 oz/375 g)
1 tsp (5 mL) ground cumin
1 tsp (5 mL) ground coriander
1/2 tsp (2 mL) salt
1/2 tsp (2 mL) pepper
1 pinch cayenne pepper
3 green onions, sliced
2 plum tomatoes, diced
1/2 sweet red pepper, diced
2 cups (500 mL) cooked or canned black beans, drained and rinsed
1 cup (250 mL) corn kernels
1/4 cup (60 mL) chopped fresh coriander
2 tbsp (30 mL) lime juice
In saucepan, heat half of the oil over medium heat; cook garlic and paprika, stirring, until fragrant, about 30 seconds.
Stir in quinoa. Add 2 cups (500 mL) water; bring to boil. Reduce heat, cover and simmer until no liquid remains and quinoa is tender, about 15 minutes.
Meanwhile, in large skillet, heat remaining oil over medium-high heat; saute chicken, cumin, ground coriander, salt, pepper and cayenne until browned, about 5 minutes.
Add green onions, tomatoes, red pepper, black beans and corn; cook over medium heat, stirring, until red pepper is tender-crisp and chicken is no longer pink inside, about 5 minutes. Transfer to large bowl. Add quinoa, coriander and lime juice; toss to combine. (Make-ahead: Let cool; refrigerate in airtight container for up to 24 hours.)
Variation:
Red Quinoa Salad with Chicken and Black Beans: Replace quinoa with red quinoa. Increase cooking time to 20 to 25 minutes.

Quinoa and Barley Salad.
¼ tsp (1 mL) salt
2/3 cup (150 mL) barley
2/3 cup (150 mL) quinoa, rinsed
1 tbsp (15 mL) extra-virgin olive oil
½ cup (125 mL) each finely diced carrots, celery and onion
½ cup (125 mL) each finely diced sweet red pepper and zucchini
½ cup (125 mL) finely diced cucumber
1 tbsp (15 mL) chopped fresh parsley
1 tbsp (15 mL) chopped fresh mint
1 tsp (5 mL) chopped fresh thyme
Ginger Vinaigrette:
¼ cup (50 mL) extra-virgin olive oil
2 tbsp (25 mL) white wine vinegar
1 tsp (5 mL) grated gingerroot (or ¼ tsp/1mL ground ginger)
1 tsp (5 mL) Dijon mustard
In sauce, bring 1 1/3 cups (325 mL) water and half of the salt to boil; add barley. Cover, reduce heat and simmer until tender and liquid is absorbed, about 40 minutes; let cool.
Meanwhile, in sauce, bring 1 cup (250 mL) water and remaining salt to boil; add quinoa. Cover, reduce heat and simmer until tender and liquid is absorbed, about 15 minutes; let cool.
Meanwhile, in skillet, heat oil over medium heat; cook carrot, celery, onion, red pepper and zucchini, stirring occasionally, until tender-crisp, about 5 minutes. Let cool.
Ginger Vinaigrette:
In small bowl, whisk together olive oil, vinegar, ginger, mustard, salt and pepper.
In large bowl, combine barley, quinoa, vegetable mixture, cucumber, parsley, mint and thyme; pour vinaigrette over top and toss to coat. (Make-ahead: Cover and refrigerate for up to 24 hours.)
Tip:
Most quinoa you find in the grocery store has been washed and processed before packaging to remove the saponin, the soapy and bitter resin that can remain after harvesting. But because different manufacturers have different processes, it’s never a bad idea to give it a rinse yourself before you cook it to ensure you’ve gotten rid of that bitter taste.


